Showing posts with label chocolate. Show all posts

Sunday, July 24, 2011

Banana Parfait


I've noticed over the course of writing over the past few years about this, that and the other ingredient that there are a few things that folks have a particular love and devotion for.   One of those things is bananas.  We do love our bananas!  And what's not to love - they are the perfect, scrumptious, portable, non-sticky/drippy/messy fruit.  (Not that I don't sometimes love peach juice running down my chin.)


And one of the others is chocolate.  Duh.  So when I run into a recipe that has both chocolate and bananas, I know that soon I'm going to be digging into something good.  It happened to me with the Banana Bites that are still one of my most popular posts EVER, and here we go again...and this time with some angel food cake, a few almonds, some mascarpone cheese, all in a dessert that will take you, oh, about 15 minutes to assemble, and that's if you are going really slow.

Here's the scoop.  Find some pretty wine glasses, the rounder the better.  Now take some angel food cake (the kind you can buy in the bakery section of your supermarket is perfectly fine) and slice it up.  You want the initial slices to be about an inch high, and then trim those into whatever shape will fit nicely into your wine glasses. Don't worry too much about making them pretty and precise, because they are going to be drowned in this.


That's my mind-blowingly good favorite chocolate sauce from the mind-blowingly good Stonewall Kitchen, but you use whatever your favorite is.

Next you are going to whip up a mixture of mascarpone cheese (which is like a sweet cream cheese, and you can find it in the supermarket either in the cheese section or sometimes right near the cream cheese), some sugar, a little cream and if you are feeling frisky, a little amaretto.  And here we go!  Drop a piece of cake in the wineglass.  Add in some banana slices, a spoonful of the cheese mixture, some chocolate sauce and a few sliced almonds.  Repeat the layers, ending with the almonds.


The perfect, perfect ending to that special dinner party.  Or you can go ahead and have it on a regular Tuesday night.  Or both!


Banana Parfaits, adapted from Bon Appetit

  • Your favorite chocolate sauce
  • 2 tablespoons heavy whipping cream, divided
  • 3/4 cup mascarpone cheese
  • 3 tablespoons amaretto
  • 2 tablespoons sugar
  • 8 1/2-inch-thick angel food cake slices
  • 24 1/3-inch-thick diagonal banana slices (from about 3 bananas)
  • 1/3 cup (about) sliced almonds, toasted
1. Whisk mascarpone, amaretto, sugar, and 2 tablespoons cream in medium bowl until blended.
2. Using 2 1/2-inch-diameter cookie cutter, cut out round from each angel food cake slice, or just cut into irregular pieces - either is fine. Place 1 cake round in each of 4 wine goblets or old-fashioned glasses. 
3. Top each cake round with 3 banana slices, 1 heaping tablespoon mascarpone mixture, bittersweet chocolate sauce, and sprinkling of almonds. Repeat parfait layering 1 more time and serve.

Tuesday, July 19, 2011

Chocolate Merlot Tarragon Truffles


Someone I hold near and dear recently commented that I talk about some, well, strange food combinations on this blog, and I know he's sitting out there somewhere looking at the title of this recipe and shaking his head.  Because it is not every day that you run into a combination of chocolate and merlot in the same truffle, not to mention the tarragon.  I'll get to the tarragon in a sec, but this gives me yet another opportunity to mention my favorite merlot...Red Bicyclette.


It's a little hard to track down, but if you ever spot it and you are a merlot-lover like me, give it a try.  Yum.  Meanwhile, back at the tarragon...I know you might be thinking, why on earth would I toss some herbs into a mixture of perfectly good chocolate?  Merlot maybe, but tarragon?  But be brave and do it...tarragon gives these babies just a teeny hint of that anise flavor that cuts the sweetness just the right amount.  That and rolling the truffles in a nice coating of unsweetened cocoa powder.


I'm pretty much in love with this recipe, and I think it has all kinds of possibilities.  Next time (and there WILL be a next time) I might swap out the tarragon for a little bit of cayenne pepper to get a sweet and spicy thing going on.

Fun fact: this recipe was created by Giada de Laurentiis, who made them for Prince William and his new bride when they visited the States.  I'm guessing that once they had a bite of these, they started planning their return trip.  :)


Chocolate Merlot Tarragon Truffles, from Giada de Laurentiis

  • 1/3 cup heavy cream
  • 1 12-ounce bag semi-sweet chocolate chips, such as Ghirardelli
  • 1/3 cup chopped fresh tarragon leaves
  • 3 tablespoons Merlot wine
  • 1/8 teaspoon fine sea salt
  • 1/2 cup unsweetened cocoa powder
Line a baking sheet with parchment paper. Set aside.

Place the cream and chocolate in a medium bowl and place over a panof barely simmering water. Stir until the chocolate has melted and themixture is smooth, which takes about six minutes.

Stir in the tarragon, wine and salt until smooth.

Refrigerate for two hours until firm. Let the mixture stand at room temperature until moldable, which takes about 45 minutes.

Using a melon scoop, scoop level amounts of the truffle mixture on to the prepared baking sheet. Roll into 1/2-inch balls.

Place the cocoa powder in a small bowl. Roll the truffles in the cocoa powder until coated.

Arrange on a platter and serve or refrigerate in an airtight container.


Tuesday, July 5, 2011

Chocolate Espresso Cookies


So, most of the time I'm not sure the teenager even remembers that I write this blog.  Sure, she sees me tapping away on the laptop, and stretched out flat on my stomach on the grass taking yet another close-up of a peach or a bowl of spaghetti, but most of the time her mind is on all the other things that swirl through teenage minds.  Taylor Swift.  The next episode of Pretty Little Liars.  The best approach for stretching out her curfew (asking Daddy is always the best bet.)

So I was a little surprised to have this conversation last week:

Teenager:  So Mom, where is the blog post about my prom?

Me: Huh?

Teenager: You know...the prom!  You haven't blogged about my prom yet.

Me: Honey, you remember that it's a food blog, right?  Not a prom blog?

Teenager: Mom!  You always figure out how to work pictures of my major life events into the blog.  You aren't going to skip talking about my PROM, are you????

And she does have a point.  As a matter of fact, I remembered that I did a whole long recap of the junior prom last year, so I started scratching my head about how I could connect some recent recipe with my sweet teenager in her pretty senior prom dress.


It would have to be something delicious and sweet, just like her.  


Something special and a little extraordinary and a tiny bit sassy, just like her.


Something CHOCOLATE.  And in this case, chocolate with a little hit of espresso, just enough to give it a little kick of wonderfulness.  A perfect cookie, dusted with a little bit of powdered sugar.  Sweet and special and pretty as a picture.

So here they are, some espresso cookies that are just the right amount of sweet comfort as you watch your baby go off to the prom.  Stay tuned for graduation...now THAT will involve some comfort food.  Sniffle.

 Chocolate Espresso Cookies. from Bake or Break
  • 8 ounces semisweet chocolate, coarsely chopped
  • 1/4 cup unsalted butter
  • 3/4 cup firmly packed brown sugar
  • 2 large eggs
  • 1 & 1/2 cups all-purpose flour
  • 2 tablespoons espresso powder
  • 1/2 teaspoon baking powder
  • 1/2 teaspoon salt
  • 1/2 cup semisweet chocolate chips
  • confectioner’s sugar, for garnishing


  1. Place chopped chocolate and butter in microwave-safe bowl. Microwave until melted, stirring every 30 seconds. Set aside to cool slightly.
  2. Beat brown sugar and chocolate on high speed of an electric mixer until light and fluffy. Add eggs, one at a time, beating well after each addition. Set aside.
  3. in a separate bowl, combine flour, espresso powder, baking powder, and salt. Turn mixer on low speed and gradually add flour mixture to chocolate mixture. Beat until smooth. Stir in chocolate chips. Wrap dough in plastic wrap. Refrigerate about 4 hours.
  4. Preheat oven to 350. Line baking sheets with parchment paper or silicone liners.
  5. Roll dough into 1-inch balls. Place two inches apart on baking sheets. Bake 9-10 minutes, or until browned around the edges. Cool cookies on wire racks. Sprinkle with confectioners’ sugar.

Sunday, June 12, 2011

Bittersweet Chocolate and Cashew Cookie Brittle


There is something about the words "cookie" and "brittle" that just mesmerize me.  Throw in "chocolate" and "cashews" and I am helpless...I walk directly into my kitchen and start making it.  Luckily for me it was somebody's birthday (I won't say whose birthday in order to protect the innocent), and so right after they were ready I put them all in a nice gift basket and whisked them out of the house.

Well, maybe not ALL of them.  Maybe I held back just a few.  Purely in the name of science, and chocolate, and cookie brittle.

Here's what you need to know: this is basically a spin on chocolate chip cookie dough, but because of the particular mixture of ingredients, it cooks up to be a little crunchier and more, well, brittle-like.  Once you have mixed up all the ingredients you press it into one thin layer onto a foil-lined cookie sheet (the foil will both make the brittle pop up easily and if you are really lucky, save you from washing the cookie sheet.  Things like that are my goal in life.  Less cookie-sheet-washing.

Make sure you make the brittle as thin as you can - the thinner it is, the more glorious it will be.  Press press press.  Then pop it into the oven and cook it up until it is a beautiful golden color.  Now comes the hard part...waiting until it is perfectly, totally cool before you break it up into brittle pieces.   After about 45 minutes I couldn't stand it anymore and I put it into the fridge, which cooled it right down.  Now lift the up the mass of brittle and start breaking it up into whatever size pieces you like.


After which you can give it away, keep it for yourself, or split the difference.  Just make sure you try at least one.  Or ten.


Chocolate Chip Cookie Brittle, from Piece of Cake, who got it from The American Country Inn and Bed & Breakfast Cookbook, Volume II

1 cup unsalted butter, melted and cooled
2 teaspoons pure vanilla extract
1 cup sugar
1 teaspoon salt
2 cups all-purpose flour
1 cup unsalted roasted cashews
1 cup bittersweet chocolate chips

1. Preheat the oven to 350 degrees and set a rack to the center position. Pour the melted butter into a large bowl, and stir in the vanilla.
2. With a wooden spoon (or your hands, if your prefer), add the sugar, salt and flour and mix to combine--the mixture will be somewhat crumbly, like a moist pie dough.
3. Stir in the nuts and chocolate chips. Press the mixture in a thin, even layer onto an ungreased cookie sheet (use the chocolate chips as your guide--try to get them in as close to a single layer as possible throughout the dough, and you'll have the right thickness). You may not fill the entire sheet with the dough--that's okay.

4. Bake for 23-25 minutes, until light golden brown (the edges will be a bit darker than the center). Let cool completely before breaking into whatever sized pieces you desire. Store in an airtight container at room temperature.


Thursday, February 17, 2011

Mud Hens


One of the many things I have learned as a photographer is that it is pretty impossible to take a pretty picture of anything that has to do with a chicken, unless it is an actual live chicken.


I had my first experience with this when I tried (and miserably failed ) to photograph some really scrumptious fried chicken that I made one day.  If you are interested in what a photographic food blogger resorts to when she needs to blog about something she actually CANNOT photograph in any decent way, click here.

In the case of these little babies, which are called Mud Hens, the photographic-chicken-rule continued...but because I couldn't bear not to share them with the world, I did the next best thing and put these not so pretty mud hens on one of my grandmother's very pretty plates.  

Now since I know you are going to ask, here is my FAQ about Mud Hens.

1. I have no idea why they are called Mud Hens.  

2. They are a Southern dessert made up of a sugar cookie dough that is sprinkled with chopped pecans, chocolate chips and mini-marshmallows, spread with a brown sugar meringue, and baked.

3. I live with a Southern man and while he had these growing up, he also has no idea why they are called Mud Hens.  He can, however, tell you anything you want to know about any player on all the Division One college football teams in the state of Georgia.

4. The Southern husband pronounces these the following way: "Mud Hins."  I love this about him.

5. Even though I am NOT from the South,  I routinely catch myself saying "y'all."  This come from years of living with the Southern husband, and has nothing to do with Mud Hens, but #4 reminded me.

6. You must, must, must make these, because even though they are not pretty, they taste GORGEOUS.

You now know everything I know about Mud Hens.


  • 1/4 cup shortening
  • 1/2 stick butter at room temperature
  • 1 cup granulated sugar
  • 1 whole egg
  • 2 eggs, separated
  • 1 1/2 cups flour
  • 1 teaspoon baking powder
  • 1/4 teaspoon salt
  • 1 cup chopped nuts (I used pecans)
  • 1 cup mini marshmallows
  • 1/2 cup chocolate chips
  • 1 1/2 cup light brown sugar
  • 1 egg white

1. Preheat oven to 350 and butter a 9x13 inch baking dish.
2. Cream the shortening, butter and sugar in a large bowl.  Beat in the whole egg and the two egg yolks.
3. In a separate bowl, sift the flour, baking powder and salt together.  Combine the creamed mixture ith the flour mixture, blending thoroughly.  
4. Spread the  batter into the baking pan.  (If you are having trouble getting it to reach the edges of the pan, rinse your fingers in cold water and gently push the batter where you want it to go.)
5. Sprinkle the nuts, chips and marshmallows over the top of the batter.
6. Beat the 2 leftover egg whites plus the one extra egg white until stiff, fold in the brown sugar and spread over the top of the batter.  Bake for 30-40 minutes until browned on top.  Cook completely, then cut into bars.


Saturday, January 1, 2011

Baby Chocolate Coconut Cream Pies


Lately I seem to be all into the little individual servings of things. Macaroni and cheese cupcakes. French toast muffins. Banana bites. So when I spied this recipe for little individual chocolate coconut cream pies on the always fabulous Baking Bites website it made my heart go pitter-pat. Yes, a chocolate coconut cream pie where you can have the entire thing YOURSELF and not feel the slightest bit guilty.

Now, I am very sure that there is some recipe out there in the world somewhere that calls for making your own homemade graham cracker individual perfect crusts, but this is one of those cases where I invoked the chicken fried steak rule (and for you newer readers who have NO idea what I am talking about, click HERE). Anyway, this particular recipe called for using individual pre-made graham cracker crusts, and I thought there was no way on earth my supermarket was going to have them. But lo and behold! there they were right there in the baking aisle.

Now, one word about these little crusts. They come in foil pans, which was rubbing me the wrong way in terms of the whole look of my little pies. I tried taking one out of the foil pan before I started and it broke into a million delicious, unusable pieces. BUT...after the crusts were filled and chilled down in the fridge, they popped out very easily -- I pushed up just a little on the bottom to ease it out. And then I felt like all was right with the world.

So the next time you are hankering for something a little bit chocolate and a little bit coconut, these are for you!


Baby Chocolate Coconut Cream Pies, from Baking Bites

  • 5-oz bittersweet chocolate, melted and divided
  • 12 miniature graham cracker pie crusts
  • 1/2 cup all-purpose flour
  • 3/4 cup white sugar
  • 1/4 teaspoon salt
  • 2 large eggs
  • 1 1/2 cups half & half/light cream
  • 1 1/2 cups coconut milk (regular or light)
  • 1 tsp vanilla extract
  • 1 1/2 cups finely chopped sweetened flaked coconut
  • lightly sweetened whipped cream

1. Brush individual graham cracker crusts with melted chocolate, using about 1.5-oz. Place in the refrigerator to harden.

2. In a large bowl, whisk together flour, sugar and salt. Whisk in eggs, half & half and coconut milk until very smooth. Strain mixture into a medium saucepan.

3. Heat mixture over medium heat, whisking frequently, until custard begins to come to a simmer. Add in remaining 3.5-oz bittersweet chocolate and stir until chocolate is fully incorporated and mixture has thickened. Remove from heat and stir in finely chopped coconut and vanilla extract.

4. Pour into chocolate-lined pie shells and refrigerate until chilled – about 3 hours, or overnight.

5. Top with sweetened whipped cream and garnish with a little more coconut.


Thursday, December 9, 2010

Chai Hot Chocolate


Here's the thing about this time of year.  It's heartwarming, and exciting, and magical...and exhausting.  Because let's face it, we were a little busy even BEFORE we started having to make all those lists and check them twice, right?  Don't get me wrong - I like the holidays as much as the next girl.  I love decorating the entire house within an inch of its life.  Even those parts that don't especially love being draped in jingle bells...I just can't help it.


In addition to all this, my birthday is in the middle of December - and the day after my birthday is the teenager's birthday.  And six days after that is my anniversary.  From now to New Year's Eve, it's a merry, action-packed blur of wrapping paper and champagne...and I know you can relate, even without birthdays and anniversaries thrown into the mix.  Which brings me to the reason (you knew I had a reason, right??) for this particular post.  Sometime amid all the shopping and the wrapping and the baking and the tinsel, take a few minutes and make this for yourself.  This is NOT your garden variety cup of hot chocolate.  This is the kind of hot chocolate that someone who has been running around like Santa's head elf deserves.  It's not made with powder, it's made with milk and bittersweet chocolate and chai spices and brown sugar and fresh ginger.  It's topped with a sweet ginger cream that slowly melts into the chocolate.  It's an amazing, once a year holiday treat that has to be sipped slowly and with your eyes closed.

So give yourself a gift sometime in the next few weeks and make this.  Turn your favorite holiday music on low, curl up in your favorite chair, and be quietly merry.


Chai Hot Chocolate, from Epicurious
  • 4 cups low-fat milk
  • 3/4 cup bittersweet chocolate chips (I used Ghiradelli)
  • 10 cardamom pods, coarsely cracked (and if you can't find these, don't give up!  Just use a little cardamom powder, or some extra allspice)
  • 1/2 teaspoon whole allspice, cracked
  • 2 cinnamon sticks, broken in half
  • 1/2 teaspoon freshly ground black pepper
  • 5 tablespoons (packed) golden brown sugar, divided
  • 6 quarter-size slices fresh ginger plus 1/2 teaspoon grated peeled fresh ginger
  • 1 teaspoon vanilla extract, divided
  • 1/2 cup chilled whipping cream

1. Combine first 6 ingredients, 4 tablespoons brown sugar, and ginger slices in medium saucepan. Bring almost to simmer, whisking frequently. Remove from heat; cover and steep 10 minutes. Mix in 1/2 teaspoon vanilla.

2. Meanwhile, whisk cream, remaining 1 tablespoon brown sugar, grated ginger, and remaining 1/2 teaspoon vanilla in medium bowl to peaks.  Add more sugar to taste if not sweet enough for your taste.

3. Strain hot chocolate. Ladle into 6 mugs. Top each with dollop of ginger cream. 


Sunday, December 5, 2010

Devil's Food Butterfinger Cake


Oh, this cake.

I'm kind of at a loss, and probably the best thing to say is simply the following:

1. Devil's food cake.
2. Caramel glazed poured OVER the devil's food cake. While it is still warm. After you have poked holes in it so that the caramel can soak deep into the warm cake.

3. Freshly whipped sweetened cream on the top of the cake.

4. Crushed Butterfinger bars sprinkled liberally over the cream topping. And I do mean liberally.


At this point you may need to breathe into a brown paper bag because of all the excitement. This recipe comes from a great new cookbook called SOUTHERN PLATE that holds a particular special place in my Southern husband's heart, for obvious reasons. I think you'll be able to see from this cover why he was very happy to see this particular book on the kitchen counter.


It's full of all sorts of great stuff, but the desserts are what really caught my eye. Many of them call for packaged ingredients like cake mix, which is just fine with me because they are combined in various ways that make me need to breathe into a brown paper bag. As a matter of fact, this particular recipe called for using Cool Whip instead of homemade whipped cream, and I'm sure that would have worked out just fine. I happened to have some cream in my fridge that needed to be used, but I am certainly no stranger to the wonders of cooking with Cool Whip.


Luckily for me, my house was full of teenagers the weekend I made this cake, or there is an extremely good chance that I would have just sat down with the entire cake and a fork. You have been warned...


Butterfinger Cake, from SOUTHERN PLATE

  • 1 box devil's food cake mix
  • 1 14 ounce can sweetened condensed milk
  • 1 12 ounce jar caramel topping
  • 1 12 ounce container whipped topping (aka Cool Whip. Or make your own by whipping 1 cup heavy cream with 1/4 cup confectioner's sugar and 1 teaspoon vanilla until soft peaks form.)
  • 1-2 Butterfinger bars, crushed.

1. Prepare the cake according to package directions. Immediately after removing the cake from the oven, poke several holes in it with a fork or a skewer. Mix the condensed milk with the caramel topping and spread over the entire cake.

2. Cool cake completely, then spread the whipped topping over the top, and sprinkle the crushed Butterfinger over the topping.

3. Stand back!

Thursday, December 2, 2010

More Holiday Kitchen Gifts


So, if you've been following this blog this week, you know that I have been up to my ears in sugar and spice and lots of things VERY nice as I have been trying out all kinds of treats that are perfect for wrapping up and giving to near and dear ones for the holidays. And while I do love all these new recipes, it reminds me that I have some old favorites that are pretty delectable as well.

So just as a reminder, here are a few treats from Christmas Past, starting with one that is absolutely guaranteed to be a huge hit, and that is Cookie Truffles! Super-easy to make, and you can make them in either Chocolate Nutter-Butter variety (pictured above) or the equally wonderful White Chocolate Oreo version. Here's the link:

Cookie Truffles

Now, for all you fudge fans out there, here's the perfect marriage of fudge and the holidays...


...and that is Eggnog Fudge, with a little nutmeg sprinkled on top. And if you give it to your true love on a pretty holiday plate, you won't even have to look around for any mistletoe. Here's the link for this one:

Eggnog Fudge

Next is a recipe that is SO fabulous, I actually had to make an entire secret batch for my sweet little sister last year and sneak it to her out of sight of the rest of the family. As she will tell you, this crunchy, salty, sweet, chocolate extravaganza is, um, well worth hiding from the rest of the gang!


It's called Cookie Brittle, and you actually make it with not cookies but saltines, and you really MUST make it because it is crazily good. Here's the link:

Cookie Brittle

And now that you have made all these delectable treats for everyone else, here's one that you need to make for yourself. This is my most beloved recipe because it came to me from my grandmother, and it is - day in and day out - the single most popular recipe on my blog. So if you haven't made them already, give yourself a gift from the kitchen... make them this holiday season, settle down with a cookie and a cup of tea, and you will know why they are my very favorite cookie. From me to you, my grandmother's molasses cookies, with love.


Here's the link:

My Grandma's Molasses Cookies

And now for the most important recipe of all this holiday season: Gather up your favorite people. Mix in some babies and grandparents and stir well. Wrap securely in hugs and sprinkle with kisses.


From my kitchen to yours - a sweet holiday season, my friends!

xox * Kate * xox

Wednesday, December 1, 2010

Chocolate Pretzel Bites


I've been happily cooking away for days now testing holiday "gifts from the kitchen" recipes." My kitchen is a cheery, sticky mess of sugar, chopped nuts, and more chocolate than the eye can see. The Southern husband and the teenager keep drifting in and out to sample things, and I keep having to explain to the dog that, incredibly unfair as it may seem, dogs are not allowed to eat chocolate, even if it falls on the floor. Even if she is wearing a completely adorable Christmas collar with a jingle bell on it. Sorry, pooch.

And out of all of this merry chaos, out of all the sweet treats I have mixed up, this one is my hands-down favorite. Sweet and salty, peanut butter and chocolate, smooth and crunchy, this one could not be easier to make or more addictive to have on your counter. Or to have HAD on your counter, because the bowl I had on my own counter is now sadly empty.

Here's what you need:

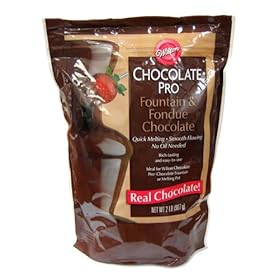
A bag of what they call "fountain and fondue chocolate," and before you panic, they have giant bins of this stuff at Michael's craft stores. I bought several bags, just in case I can't stop myself from making MORE of these.


You also need a couple of bags of those little pretzel peanut butter sandwiches (I used the Snyder's brand. Two 8 ounce bags.


Plus peanuts, peanut butter chips, shortening and some bittersweet chocolate chips. (I'm assuming here that you know what all that stuff looks like so no more cute little explanatory pictures.)

Okay! You melt up the two chocolates in the microwave, and then dump in the pretzels. Swirl them around until they are good and coated with melted chocolate. Then scoop them out with a fork (which lets the excess chocolate drip off) and lay them in a single layer on cookie sheets that have been lined with wax paper. Now sprinkle them with chopped up peanuts. So far so good...but there's MORE. Melt the peanut butter chips with a little shortening in the microwave and pour it into a ziploc bag. Now snip a corner of the bag and drizzle the peanut butter mixture over the pretzels. Now pop them in the fridge until the chocolate is hardened and then break them apart.

You have now achieved perfect chocolate and peanut butter happiness. Now all you have to do next is decide: are you REALLY going to wrap them up and give them away?

I'll leave that entirely up to you.

Chocolate Pretzel Bites, adapted from Southern Living

  • 2 1/2 cups fountain and fondue chocolate
  • 3 ounces bittersweet chocolate chips
  • 2 eight ounce bags pretzel sandwich crackers
  • 1 cup chopped salted peanuts
  • 3/4 cups peanut butter morsels
  • 1 1/2 tablespoons shortening

1. Microwave both chocolates in large bowl for 2-3 minutes or until melted, stirring at 1 minute intervals.

2. Pour pretzels into bowl of melted chocolate and stir gently until coated. Lift out with fork, allowing excess chocolate to drip off, and lay in single layer on cookie sheets lined with wax paper.

3. Sprinkle chopped peanuts over pretzels.

4. Melt peanut butter chips and shortening in microwave for 30 seconds or until chips are soft. Stir until smooth and spoon into ziploc bag. Snip tiny corner off off bag and squeeze peanut butter mixture over pretzels.

5. Put cookie sheets in the fridge until chocolate has hardened, about an hour. Break into pieces.


Sunday, November 28, 2010

Chocolate Nut Clusters


It's that time of year again!  We are racing around shopping, wrapping, decorating, making our lists and checking them twice.  And if you are like me, either cooking, getting ready to cook, making notes about what to cook, or cleaning up after the cooking.  My kitchen and I have our closest relationship at this time of the year, and even though it is EXHAUSTING at times, I do pretty much love it.

And one of the things I like most is making things that I can give as holiday gifts,  things that are sweet and salty and just a little bit decadent.  And at this time of the year, if they are easy and reliable, that's a gift to ME as well.  So while I usually try and make my weekly blog posts a well-balanced mixture of main dishes and sides and desserts, this week we are going to have a steady diet of sweet treats, all of which are easy and scrumptious and just right for popping in a pretty bag with a ribbon and handing over to someone you love.  Ready?

Here's the first and probably the easiest one - this one will be ready to wrap in about 30 minutes from start to finish.  It's a sinfully good, completely addictive nut bark made with (and this is the full list of ingredients): mixed nuts, semi-sweet chocolate and sea salt.  Yep, those three ingredients are the only things standing between you and one more gift checked off your list.  Here's the deal:  Spread out 2 cups of salted mixed nuts on a baking sheet lined with parchment or no-stick foil.  Now pour six  ounces of semi-sweet chocolate chips into a bowl and microwave them for 30 second increments, stirring after each 30 seconds, until they are smooth and melted.  (This took me 90 seconds with my microwave).  

Once your chocolate is nice and smooth, scoop it into a ziplock bag.  Cut the teeniest bit you can off of one of the bottom corners of the bag, and squeeze the melted chocolate down towards that corner.  You have now made yourself a pastry bag!  Now squeeze the chocolate out of that opening into lovely little drizzles all over the nuts, making sure you cover all of them with at least a little chocolate.

Now take just a little sea salt - about 1/2 teaspoon is plenty - and sprinkle it lightly over the chocolate nuts.  Make sure you use sea salt and not regular table salt, which will be too intense-tasting.  Now pop the whole thing in the fridge, and in about 20 minutes it will be hardened enough for you to break into glorious little chunks.


Now all you have to do is summon the willpower not to eat all of it before you package it up for that lucky someone.

Mixed Nut Vanilla Brittle coming next so stay tuned!

Chocolate Nut Clusters, adapted from Real Simple

  • 2 cups mixed nuts
  • 6 ounces semi-sweet chocolate (I used Ghiradelli morsels)
  • Sea salt


1. Spread nuts in a single layer on a cookie sheet lined with parchment paper
2. Pour chocolate chips into a bowl and microwave them for 30 second increments, stirring after each 30 seconds, until they are smooth and melted. 
3. Spoon melted chocolate into a ziplock bag. Snip off of one of the bottom corners of the bag, and squeeze the melted chocolate down towards that corner. Squeeze the chocolate out of that opening into lovely little drizzles all over the nuts, making sure you cover all of them with at least a little chocolate.
4. Take just a little sea salt - about 1/2 teaspoon is plenty - and sprinkle it lightly over the chocolate nuts.  Make sure you use sea salt and not regular table salt, which will be too intense-tasting.  
5. Put the tray in the fridge for about 30 minutes or until chocolate is hardened.  Break into chunks.

Thursday, October 7, 2010

Chocolate-Dipped Potato Chips


This is one of these things that I make and then think, how could I possibly have lived all these years on this earth and only be making these NOW?  As a devoted member of the Sweet and Salty Club, you'd think I would have seen the light ages ago, but it took until last weekend for me to figure this out...and let me just say that it was worth the wait.  Salty crunchy potato chip meets semi-sweet chocolate, and if you had trouble only eating one chip before, you are completely doomed now.

Here's what you do: grab a cookie sheet and line it with a sheet of wax paper.  Tear open a bag of ridged potato chips (the normal kind might not be thick enough to hold the chocolate) and pick out the best looking ones.  Melt about 6 ounces of chocolate chips by nuking them for 30 seconds at a time until they are smooth and creamy.  I used semi-sweet Ghiradelli chips for this, because Ghiradelli is my chip of choice whenever I am making something that requires serious chocolate.  Maybe it is because the Southern husband and I got engaged in San Francisco (home of the Ghiradelli factory).  Maybe it is because it is fantastic chocolate.  Maybe it is both.

Anyway, once you have your chocolate nice and melted, you just dip half of each chip into the the melty chocolate, lay it tenderly on the cookie sheet, sprinkle the tiniest bit of sea salt on the chocolate, and then put the whole cookie sheet in the fridge for about 20 minutes or so.


Then put the chocolate covered chips on a nice plate and stand back.  Eyes will widen.  Smiles will form.  And you will wonder why this took you so long to figure out.  You and me both.


Chocolate-Dipped Potato Chips, adapted from Real Simple
  • 24 ridged potato chips
  • 6 ounces semi-sweet chocolate chips
  • Kosher or sea salt (don't use regular table salt, it won't taste as good)

1. Lay a sheet of wax paper on a cookie sheet

2. Melt chips in the microwave by heating for 30 seconds at a time, stirring after each 30 second interval until smooth

3. Dip each chip halfway into melted chocolate and lay on wax paper.  Sprinkle with a tiny bit of salt.

4. Cool in fridge until hardened, then get out the way.  These are addictive!!


Tuesday, September 14, 2010

White Chocolate Vanilla Ice Cream...Without The Ice Cream Maker!


First of all, let me say that I DO own an ice cream maker. And as much as I love most of my kitchen appliances, from my rice cooker right on through to my popcorn popper (no microwave popcorn for me!), I just haven't been able to bond with the ice cream maker. It's a perfectly nice ice cream maker - it's just that it seems like such a production to freeze the inner liner, make the custard, put everything together the exact right way, and then say a prayer to the powers that be that it all comes out the right way.

So when I came across this recipe on the Cooks Country site, and read that it required exactly NO ice cream maker, I thought I better give it a try. And as it turns out, it was AMAZING ice cream. A gorgeously creamy consistency, a little hit of white chocolate taste, and all you need is your mixer and your microwave.

I thought it was feeling too good to be true, so I put it to the ultimate test, otherwise known as the teenager and her best friend. They loved it, and then told me that in return for their taste-testing services they were expecting to see their picture in this post. So here they are.


I love them dearly, but they don't usually look like this, just for the record. Nor did they actually go to the prom together, also for the record. But that's the most current picture I have of them, so there you go.

Back to the ice cream. You melt some condensed milk and a tiny amount of white chocolate chips in the microwave, and let it cool. Then you whip up some heavy cream in your mixer. Back to the melted chocolate chips: stir in some sour cream and some vanilla. Then you fold the whole thing together, freeze it for at least 6 hours (we let ours freeze overnight), and then you are ALMOST ready to dig in.I say almost because this fabulous ice cream is made completely perfect by adding some of this to the top of it.


Otherwise known as the best chocolate sauce on Planet Earth. (And by the way, if you haven't entered into my giveaway for a signed copy of STONEWALL KITCHEN FAVORITES, the completely fabulous cookbook from my friends at Stonewall Kitchen, then please click here without delay!)

So there you have it -- scrumptious ice cream, no ice cream maker, and with this amazing chocolate sauce...well, life doesn't get much better.


White Chocolate Vanilla Ice Cream, adapted from Cooks Country

1/2 cup sweetened condensed milk
1 ounce white chocolate chips
1 tablespoon vanilla extract
Pinch salt
1/4 cup sour cream
1 1/4 cups cold heavy cream

1. Microwave condensed milk and chocolate chips in 30 second increments until chips are melted and smooth, stirring after each 30 seconds. Let cool, and then stir in vanilla, salt and sour cream.

2. Whip heavy cream on medium high speed until soft peaks form, 1-2 minutes. Whisk 1/3 cream into white chocolate mixture. Fold remaining cream in until well mixed and smooth.

3. Place in airtight container and freeze for at least 6 hours or up to 2 weeks.


Sunday, September 5, 2010

Molasses Chocolate Chunk Cookies, And My Summer Vacation!

Molasses chocolate chunk cookies

You know when you get together with friends, and you are glad to see them and are looking forward to getting down to talking about whatever it is you want to talk to them about, but first you have to suffer through their vacation pictures?  Think of this as the blog version of that.  I have a wicked good molasses chocolate chip cookie recipe to tell you about, but first....

My vacation.  :)

Every year we go to my favorite, favorite place in the world, which is the beautiful green mountains of Vermont.  If you really want to know how much I love this place, you can click here, or here.  If you don't, just take a look at this picture to see why.


I love both the gorgeous blue-green mountains AND the cows with equal amounts of love.  Which is good, because Vermont has a ton of both.  Here's our little piece of paradise, otherwise known as the cabin.  Where there is no cell phone service.  Or paved roads.  Nothing but corn and cows and quiet.


And this spectacular view from the south window, which makes me cry when I get there and cry when I leave.


Did I mention the cows?


This was breakfast.  Still warm off the vine.  Nothing else needed.


And here are my favorite chairs in the entire world, facing that view.


Anyway, going to Vermont always reminds me of my grandmother, and her amazing molasses cookies, and so when I found this recipe for molasses cookies with chocolate chunks on the fabulous Joy The Baker site RIGHT before I headed up there, I knew I had to make 'em.  And while my grandma's will always be my favorite recipe, these were pretty wonderful too!

Did I mention there were cows?


Here's the recipe.  :)


Molasses Chocolate Chunk Cookies, adapted slightly from Joy The Baker, who adapted it from Alton Brown.

2 sticks unsalted butter
2 cups plus 2 Tablespoons bread flour
1 teaspoon kosher salt
1 teaspoon baking soda
1 1/2 cups granulated sugar
1/4 cup plus 1 teaspoon dark molasses, not blackstrap
1 egg
1 egg yolk
1 1/2 teaspoons vanilla extract
1 cup chocolate chips or chunks
sea salt for sprinkling on top of cookies just before baking
Heat oven to 350 degrees F.
Melt the butter in a heavy-bottom medium saucepan over low heat. Sift together the flour, salt, and baking soda and set aside.
In a medium sized bowl, mix the granulated sugar and molasses until no large molasses clumps remain. 
Pour the melted butter in the mixer’s work bowl. Add the homemade brown sugar. Cream the butter and sugar on medium speed for about 3 minutes. Add the egg, yolk, and vanilla extract and mix until well combined. Slowly incorporate the flour mixture until thoroughly combined. Stir in the chocolate chips.
Chill the dough for about 20 minutes, then scoop onto parchment-lined baking sheets.  Lightly sprinkle each dough ball with a few flecks of sea salt.  
Bake for 8 to 10 minutes or until golden brown.  Cool completely and store in an airtight container.


Sunday, June 20, 2010

Ice Cream Cupcakes


Some recipes are just a work of genius -- you run across them and first you think "I have GOT to make this as soon as possible," and for me that is quickly followed by "now, why didn't I think of this??" These delectable little ice cream cupcakes are from one of those recipes, and are from Joy The Baker, who is a virtuoso when it comes to inventive and irresistible desserts. A virtuoso, plain and simple.

Here's the drill: you make up a batch of brownie batter (Joy makes her own, I went right for that Duncan Hines box in my pantry), and you spoon just a little bit into foil cupcake liners. Just enough to cook up a fabulous brownie base for your cupcake. Bake and freeze. Then grab your favorite flavor or flavors of ice cream and let it soften. I chose (from left to right in that picture up there) chocolate, mint chocolate chip, and Starbucks Mocha Frappachino. Spoon enough soft ice cream on top of each brownie bottom to fill the cupcake liner. Freeze again.

What you do from here is up to you. Plain would be fine. Joy makes a little chocolate ganache to go on top of hers. I whipped up some cream with a little sugar and vanilla and plopped it on top of each cupcake. Now, the three specimens up there did not last much past their photo op, but the rest of their cousins went into a Ziplock bag, and the next time we got a craving for an ice cream cupcake all we had to do was take one out of the bag and add the topping. Or take one out of the bag and eat it immediately while still standing in front of the freezer.

Ice Cream Cupcakes. Happy happy summer.

Ice Cream Cupcakes, from the incredibly talented Joy The Baker

  • One batch brownie batter
  • Assorted flavors of ice cream

1. First make the brownie batter. Line two cupcake pans with the foil cupcake liners. Into each cupcake liner, scoop 1 Tablespoon of brownie batter. Bake at 350 degrees F for about 6-8 minutes until the brownie is cooked through.

2. Let the brownies cool in the cupcake pans to room temperature. Once cool, place in the freezer (still in the cupcake pans) for 30 minutes. When you place the cupcake pans in the freezer, remove the ice cream you’re using and place in the refrigerator to soften.

3. When ready to assemble the cupcakes, remove the cupcake pans with foil lined brownie cups from the freezer. Remove the ice cream from the fridge. Run the ice cream scooper under hot water and working quickly, portion a small scoop of ice cream into each foil lined cup, while still in the cupcake pan. The cupcake pan will help the Ice Cream Cupcake hold its shape. You may need to rinse the scooper under hot water in between scoops for easy portioning. Quickly smooth the scoops of ice cream with the back of a small spoon also rinsed in warm water and return the ice cream cupcakes quickly to the freezer.

4. Let the newly formed Ice Cream Cupcakes refreeze for 45 minutes to an hour.

5. To serve, remove the cupcakes from the freezer about 5 minutes before you’d like to serve them. Finish with a dollop of whipped cream and serve.

Click here for printable recipe

Monday, May 31, 2010

Puppy Chow!


There are several things I must say IMMEDIATELY about this recipe.

First of all, it is Puppy Chow for people, not puppies. It is a concoction of Chex cereal that has been coated in chocolate and peanut butter and dusted with powdered sugar, and it is utterly addictive. I actually have no idea why it is called Puppy Chow in the first place, but every recipe I have come across for this stuff calls it Puppy Chow. Maybe because puppies are also addictive? But since it involves chocolate, which is bad for dogs, puppies are not allowed to eat it. Under any circumstances. Even if they look at you with big puppy dog smiles.


Even if they look at you with mournful puppy dog faces.


Even if they are so incredibly adorable you not only want to give them your puppy chow, but also take them home with you and hope your Southern husband doesn't notice.


Even if they look at you with big brown puppy dog eyes.


With pleading puppy dog wrinkled foreheads....


Even if they lie down and beg.


Or stand up and beg. Remain firm.


The next thing I have to say about this recipe is that I washed out that dog dish before I put the puppy chow into it. Or to be totally accurate, the Southern husband washed it for me. And then I proceeded to do one of the most cold-hearted things I have ever done to get a picture.

I took my dog's (clean!) bowl, which she absolutely knows belongs to her, and filled it full of chocolate puppy chow. I took one of my dog's beloved Milkbones and put it next to the bowl. I took my dog's leash, which to her means "hurray, let's go for a walk!" and arranged it next to the bone and the dish. I put it all right next to the back door, where she frequently eats her dinner. She thought it was Christmas and her birthday all rolled into one...and then I said the word she hates above all others.

NO.

She is such a good dog. She knows what "NO" means, and with every ounce of willpower she had in her doggy self, she didn't touch the bowl. But that doesn't mean she was happy about it. Oh no, she wasn't.


But I finally finished shooting the thing - it took about 15 minutes, which is about one thousand years in dog-time, and said ""Dixie! Want that Milkbone?"


Good things come to good dogs who wait. :-)

For the rest of us, here's the recipe for the Puppy Chow.


Puppy Chow!

1/2 cup peanut butter
1/4 cup butter
1 cup chocolate chips
1/2 teaspoon vanilla
9 cups Chex cereal (Any variety. I used Wheat Chex)
1-1/2 cups powdered sugar

1. Place peanut butter, butter and chocolate chips in a microwave safe bowl.

2. Microwave for one minute, then stir to blend all ingredients thoroughly. Microwave an additional 30 seconds if not fully melted. Add 1/2 tsp. vanilla and stir well.

3. Put the Chex into a large bowl and pour the chocolate mixture over the cereal. Mix it up throughly, making sure all the cereal gets coated.

5. Divide the cereal mixture into two gallon-sized plastic zip-lock bags. Add one cup of powdered sugar to each bag and shake the bag gently until the cereal is well-dusted with sugar.

6. Spread the cereal on a cookie sheet lined with wax paper and refrigerate for one hour. Store in refrigerator in between servings.

Click here for printable recipe