Showing posts with label peanut butter. Show all posts

Wednesday, December 1, 2010

Chocolate Pretzel Bites


I've been happily cooking away for days now testing holiday "gifts from the kitchen" recipes." My kitchen is a cheery, sticky mess of sugar, chopped nuts, and more chocolate than the eye can see. The Southern husband and the teenager keep drifting in and out to sample things, and I keep having to explain to the dog that, incredibly unfair as it may seem, dogs are not allowed to eat chocolate, even if it falls on the floor. Even if she is wearing a completely adorable Christmas collar with a jingle bell on it. Sorry, pooch.

And out of all of this merry chaos, out of all the sweet treats I have mixed up, this one is my hands-down favorite. Sweet and salty, peanut butter and chocolate, smooth and crunchy, this one could not be easier to make or more addictive to have on your counter. Or to have HAD on your counter, because the bowl I had on my own counter is now sadly empty.

Here's what you need:

A bag of what they call "fountain and fondue chocolate," and before you panic, they have giant bins of this stuff at Michael's craft stores. I bought several bags, just in case I can't stop myself from making MORE of these.
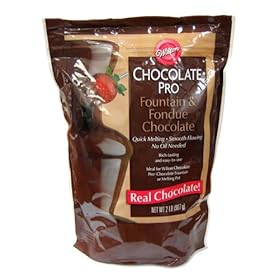

You also need a couple of bags of those little pretzel peanut butter sandwiches (I used the Snyder's brand. Two 8 ounce bags.


Plus peanuts, peanut butter chips, shortening and some bittersweet chocolate chips. (I'm assuming here that you know what all that stuff looks like so no more cute little explanatory pictures.)

Okay! You melt up the two chocolates in the microwave, and then dump in the pretzels. Swirl them around until they are good and coated with melted chocolate. Then scoop them out with a fork (which lets the excess chocolate drip off) and lay them in a single layer on cookie sheets that have been lined with wax paper. Now sprinkle them with chopped up peanuts. So far so good...but there's MORE. Melt the peanut butter chips with a little shortening in the microwave and pour it into a ziploc bag. Now snip a corner of the bag and drizzle the peanut butter mixture over the pretzels. Now pop them in the fridge until the chocolate is hardened and then break them apart.

You have now achieved perfect chocolate and peanut butter happiness. Now all you have to do next is decide: are you REALLY going to wrap them up and give them away?

I'll leave that entirely up to you.

Chocolate Pretzel Bites, adapted from Southern Living

  • 2 1/2 cups fountain and fondue chocolate
  • 3 ounces bittersweet chocolate chips
  • 2 eight ounce bags pretzel sandwich crackers
  • 1 cup chopped salted peanuts
  • 3/4 cups peanut butter morsels
  • 1 1/2 tablespoons shortening

1. Microwave both chocolates in large bowl for 2-3 minutes or until melted, stirring at 1 minute intervals.

2. Pour pretzels into bowl of melted chocolate and stir gently until coated. Lift out with fork, allowing excess chocolate to drip off, and lay in single layer on cookie sheets lined with wax paper.

3. Sprinkle chopped peanuts over pretzels.

4. Melt peanut butter chips and shortening in microwave for 30 seconds or until chips are soft. Stir until smooth and spoon into ziploc bag. Snip tiny corner off off bag and squeeze peanut butter mixture over pretzels.

5. Put cookie sheets in the fridge until chocolate has hardened, about an hour. Break into pieces.


Thursday, September 16, 2010

Sesame Noodles with Cucumber Cashew Salad


I can't remember the first time I discovered soba noodles, but once I did I kinda felt like I had won the food lottery. Soba noodles are made of buckwheat, and addition to being really, really tasty, they are actually pretty good for you, as far as pasta goes. And when you pair them with a scrumptious sauce and nestle a delicious cucumber cashew salad next to them...well, it's a good day when you can say you are having a super-delicious dinner and being virtuously healthy all at the same time. Right?

This quick cold noodle salad is another one from my week-long celebration of one of my new favorite cookbooks, STONEWALL KITCHEN FAVORITES, and if you haven't yet entered the giveaway for a signed copy of this fantastic book, click here. In the meantime, here's the scoop on this salad. The sauce is a speedy combo of garlic, ginger, scallions, tahini, chili paste, soy sauce and my personal favorite kitchen ingredient, peanut butter. You thin it down a little with some hot water from the cooking pasta, toss in some cilantro if you are a cilantro person, and that's it. The salad is a simple combo of chopped cucumber and cashews tossed with sesame oil and white vinegar with a little ground pepper.

All these exotic ingredients can usually be found in any decent supermarket. If you absolutely can't find soba noodles anywhere (and I promise you that Amazon will have them!), you can sub in linguine. You just won't get to feel as completely virtuous. All of this wonderfulness is fabulous on its own, and also the perfect accompaniment to grilled steak or chicken or fish.


Here's the delish recipe, and don't forget to enter the giveaway!


Sesame Noodles with Cucumber Cashew Salad, from Stonewall Kitchen Favorites

# minced garlic cloves
3 tablespoons minced fresh ginger
4 scallions, thinly sliced
1/2 cup peanut butter
1/4 cup tahini
2 teaspoons chili paste
1/4 cup soy sauce
1/4 cup minced cilantro
1 eight ounce package soba noodles (or linguine)
Sesame seeds for garnish

1 seedless cucumber, chopped
3/5 cup coarsely chopped cashews
2 tablespoons sesame oil
2 tablespoons rice or white wine vinegar
Fresh ground pepper

1. Bring large pot of lightly salted water to a boil.

2. In a large bowl, mix garlic, ginger and scallions. Mix in peanut butter and tahini. Add chili paste and soy sauce and stir well. Add 1/2 cup hot water from the pot and stir into sauce. Add cilantro.

3. Make salad by mixing cucumber, cashews, sesame oil and vinegar in a separate small bowl. Set aside.

4. Add noodles to boiling water and cook until just tender. Drain and run under cold water until cool. Drain again and toss with sauce until well-coated. Sprinkle with sesame seeds. Serve with cucumber salad on the side.

Sunday, August 22, 2010

Peanut Butter Popcorn


We are big old popcorn lovers in this house.  And not just the microwave variety of popcorn, although I am perfectly okay with that in a pinch.  No, we have a jar of the old-fashioned kernels, and a great Cuisinart popcorn popper than involves a little oil and some salt and melting up some butter.  And I thought that was pretty much the best route to old-fashioned popcorn.  Until my friend L sent me this.


And I have to admit, I was a doubter.  Six ears of rock-hard corn.  It sat in my cabinet for a good long while, until the day that I decided to try this recipe I had kicking around for peanut butter popcorn.  And since I knew the popcorn was going to get drenched in a coating of peanut butter marshmallow wonderfulness, I thought, why not try the corn-cobs?  So I hauled them out of the cabinet and took a look at the label.


The deal is that you take one of those ears, put it in a brown paper bag, put it in the microwave for a couple of minutes, and voila!  Perfect and delicious popcorn without a chemical in site.  What took me so long???   I'm a believer.

So then it was on to the peanut butter popcorn, which as I mentioned above, involves making a mixture of marshmallow and peanut butter and regular butter, melting the whole thing together and stirring it into a bowl of popcorn and peanuts.  Spread it out on some wax paper, let it cool and harden, and life is pretty close to perfect for a while.  

Next time I am going to drizzle just a little melted chocolate over the whole thing - what do you think???


Peanut Butter Popcorn, adapted from Allrecipes

2 3.5 ounce packages microwave popcorn, popped (or the equivalent)
1/2 cup butter
3/4 cup brown sugar
1/4 cup peanut butter
20 large marshmallows
1/2 cup salted peanuts

 1. Pour popcorn and peanuts into a large bowl.  Preheat oven to 250.  Line cookie sheet with foil and spray with cooking spray.

 2. In a glass or plastic bowl, combine the margarine, brown sugar, and marshmallows. Cook at 1 minute intervals in the microwave, stirring between each time, until the mixture is melted and smooth. 

 3. Stir in the peanut butter until well blended. Pour the melted mixture over the popcorn, and stir quickly to coat the corn before it cools.  Pour in single layer onto cookie sheet.

 4.  Bake for 30 minutes, stirring after 15 minutes.

 5. Cool, and I dare you not to eat the entire batch in one sitting.  :)


Thursday, July 29, 2010

Banana Cupcakes with Peanut Butter Frosting


I do love baking with bananas. But somehow, I always seem to fall into a banana-baking rut by making the same old thing over and over. Banana bread, right? You see those, um, aging bananas on your counter and your mind goes blank except for the banana bread. Now, a few weeks ago I broke out of my banana rut and made these cute little banana bites, and I was just overwhelmed by all the banana love that came my way from all you banana-fans out there.

And so I was inspired, and I have been collecting banana recipes ever since. On my to-make list over the coming weeks are: Layered chocolate banana parfaits. Bisquick banana muffins. I even have a recipe on deck for Extreme Banana Bread, made with SIX bananas. Crazy, right? But in the midst of all this banana-rama I found a recipe for banana cupcakes with whipped peanut butter frosting. The cupcakes are like a light, airy banana bread, and the frosting....peanut butter heaven.

One last little observation -- that frosting job that I did on the cupcakes involved a pastry bag and one of those little star-shaped decorating tips, which all sounds very fancy and complicated, but it's as easy as easy can be. But feel free to slather that frosting on there however you want. It's going to taste AWESOME no matter what it looks like.

It's a banana summer!


Banana Cupcakes with Peanut Butter Frosting, from Bon Appetit

  • 1 1/4 cups all purpose flour
  • 1 1/2 teaspoons baking powder
  • 1/2 teaspoon baking soda
  • 1/4 teaspoon salt
  • 2 very ripe large bananas, peeled
  • 1/2 cup sour cream
  • 1 1/2 teaspoons vanilla extract
  • 3/4 cup sugar
  • 1/2 cup (1 stick) unsalted butter, room temperature
  • 1 large egg
  • 1 large egg yolk
  • 1 1/2 cups powdered sugar
  • 1 8-ounce package cream cheese, room temperature
  • 1/2 cup (1 stick) unsalted butter, room temperature
  • 1/2 cup smooth peanut butter (do not use old-fashioned or freshly ground)
  • Chopped lightly salted roasted peanuts (optional)

1. Position rack in center of oven and preheat to 350°F. Line 12 standard (1/3-cup) muffin cups with paper liners. Whisk flour, baking powder, baking soda, and salt in medium bowl to blend. Mash bananas with fork in another medium bowl until smooth. Mix sour cream and vanilla into bananas.


2. Using electric mixer, beat sugar and butter in large bowl until light and fluffy, about 3 minutes. Add egg and egg yolk and beat until well blended. Add flour mixture in 3 additions alternately with banana-sour cream mixture in 2 additions, beginning and ending with flour mixture and beating just until blended after each addition. Divide batter among prepared muffin cups (generous 1/4 cup for each).


3. Bake cupcakes until tester inserted into center of each comes out clean, about 20 minutes. Transfer cupcakes to rack and let cool completely. 

4. Sift powdered sugar into large bowl. Add cream cheese, butter, and peanut butter. Using electric mixer, beat mixture until smooth. Spread frosting over top of cupcakes, dividing equally.

Monday, May 31, 2010

Puppy Chow!


There are several things I must say IMMEDIATELY about this recipe.

First of all, it is Puppy Chow for people, not puppies. It is a concoction of Chex cereal that has been coated in chocolate and peanut butter and dusted with powdered sugar, and it is utterly addictive. I actually have no idea why it is called Puppy Chow in the first place, but every recipe I have come across for this stuff calls it Puppy Chow. Maybe because puppies are also addictive? But since it involves chocolate, which is bad for dogs, puppies are not allowed to eat it. Under any circumstances. Even if they look at you with big puppy dog smiles.


Even if they look at you with mournful puppy dog faces.


Even if they are so incredibly adorable you not only want to give them your puppy chow, but also take them home with you and hope your Southern husband doesn't notice.


Even if they look at you with big brown puppy dog eyes.


With pleading puppy dog wrinkled foreheads....


Even if they lie down and beg.


Or stand up and beg. Remain firm.


The next thing I have to say about this recipe is that I washed out that dog dish before I put the puppy chow into it. Or to be totally accurate, the Southern husband washed it for me. And then I proceeded to do one of the most cold-hearted things I have ever done to get a picture.

I took my dog's (clean!) bowl, which she absolutely knows belongs to her, and filled it full of chocolate puppy chow. I took one of my dog's beloved Milkbones and put it next to the bowl. I took my dog's leash, which to her means "hurray, let's go for a walk!" and arranged it next to the bone and the dish. I put it all right next to the back door, where she frequently eats her dinner. She thought it was Christmas and her birthday all rolled into one...and then I said the word she hates above all others.

NO.

She is such a good dog. She knows what "NO" means, and with every ounce of willpower she had in her doggy self, she didn't touch the bowl. But that doesn't mean she was happy about it. Oh no, she wasn't.


But I finally finished shooting the thing - it took about 15 minutes, which is about one thousand years in dog-time, and said ""Dixie! Want that Milkbone?"


Good things come to good dogs who wait. :-)

For the rest of us, here's the recipe for the Puppy Chow.


Puppy Chow!

1/2 cup peanut butter
1/4 cup butter
1 cup chocolate chips
1/2 teaspoon vanilla
9 cups Chex cereal (Any variety. I used Wheat Chex)
1-1/2 cups powdered sugar

1. Place peanut butter, butter and chocolate chips in a microwave safe bowl.

2. Microwave for one minute, then stir to blend all ingredients thoroughly. Microwave an additional 30 seconds if not fully melted. Add 1/2 tsp. vanilla and stir well.

3. Put the Chex into a large bowl and pour the chocolate mixture over the cereal. Mix it up throughly, making sure all the cereal gets coated.

5. Divide the cereal mixture into two gallon-sized plastic zip-lock bags. Add one cup of powdered sugar to each bag and shake the bag gently until the cereal is well-dusted with sugar.

6. Spread the cereal on a cookie sheet lined with wax paper and refrigerate for one hour. Store in refrigerator in between servings.

Click here for printable recipe

Monday, February 22, 2010

Monster Cookies!


This one comes courtesy of my friend L, who is as sweet as these cookies. We had them at our little Super Bowl shindig recently, and people who never eat dessert (you know who you are!) ate them. People who always eat dessert ate them. People ate them before, during and after dinner. Let's just say they were a monster hit.

So of course I cornered her and pleaded shamelessly for the recipe. And unlike some of my other sweet friends (you know who you are!) she happily handed it over. And when I looked it over, I realized that the recipe is almost as fun as the cookies. It's a mix and match approach, and what I mean by that this this: You start with a cookie dough base made up of butter, sugar, flour, peanut butter and oatmeal. Then you get to pick THREE of the following to mix in....


Walnuts. (Although I'm sure if you are a pecan or an almond person, those would be okay too.)


Chocolate chips. The old classic.


Butterscotch chips. Love 'em.


Peanut butter chips. Yes, I know they look just like the butterscotch ones. You will just have to trust me on this, and know that I sampled both chips carefully, all in the name of science.


M&Ms. Mmmmmmmm&Ms. Yum.


Raisins. I gotta tell you, with the other choices, I am afraid for the raisins. Hang in there raisins, I am sure there are some healthy people out there who will pick you and the walnuts.

Once you have made your final selection, you mix 'em into to your cookie dough, bake them, put them on a plate, and stand back. Now as for the recipe below, I have not changed one word of it because I would not want to mess with perfection, and because I think the color commentary in there is just classic. L has many, many sisters, and clearly the configuration of the monster cookies is a point of family debate in her house. I see that the amounts of the mix-ins are left up to the baker to play with. I also see that L went with not three of the mix-in choices but FOUR. This is why I love this girl.

Monster Cookies. No Fear.


MONSTER COOKIES!

Preheat oven: 350˙ | Prep: 20 minutes | Cooking: 8-10 minutes | Cooling: 15 minutes
| Eating: 2-3 minutes

2 sticks of butter, softened
2 cups of white sugar
2 1/2 cups of brown sugar
6 eggs
3 cups of creamy peanut butter (one sister uses crunchy, I don't know what the difference is)
9 cups of oatmeal

Beat butter, granulated sugar, brown sugar in large mixer bowl until creamy.

Add eggs, one at a time, beating well after each addition. Gradually add peanut butter, stir in oatmeal.

Add: Choose three:

Milk chocolate chips
Butterscotch chips
Baking M&M's
Peanut butter chips
Raisins
Walnuts

I use: 3/4 bag of butterscotch chips, 1/2 bag chocolate chips, 1/3 bag peanut butter chips, 1 cup of walnuts. People seem to like the butterscotch taste. My sister uses: 2 cups of chocolate chips, 1/2 lb mini M&M's and then picks one or two of the others, adding amounts to her taste. But what does she know?!

Friday, October 30, 2009

Halloween Brownies


Mwwwhahahahahaha!

(Scary Halloween noise.)

However, there is nothing scary about these babies, unless you count the part where you make them with crushed Nutterbutter cookies. And crushed Butterfinger bars. And chopped Reese peanut butter cups. And chocolate chips. Okay, maybe that is a little terrifying. But I am a brave girl, and all I can say about these treats is, so long as you only make them once a year, you really DO need to give them a whirl. They are out of this world amazing, I promise, and just about as easy as a sinfully rich chocolately peanutty unbelievably awesome recipe can be.

This recipe is adapted from one that I ran across on the Bake or Break website (isn't that a cool name? Go visit them when you get a chance -- the link is on my blogroll. Great recipes and beautiful pictures.). Anyway, they said this was a good recipe to use for leftover Halloween candy. Huh?? First of all, the words "leftover" and "candy" have never once been combined in a sentence in my particular house. Second, if I tried to snitch even one Reeses Peanut Butter cup from my child's Halloween loot, I would be busted immediately. Believe me, that candy is inventoried as soon as it comes in the door and each piece is assigned a tracking number, and woe to the parent or dog who casually tries to filch one.

So I went to the Mount Everest of Halloween candy at Fairway and picked up my OWN, and a couple of hours later these babies were born. And they are all treat...no tricks here.


Happy Halloween!!

HALLOWEEN BROWNIES, adapted from Bake or Break
  • 1 16-ounce package Nutter Butter cookies, crushed
  • 1/2 cup butter, melted
  • 14 ounces sweetened condensed milk
  • 1/2 cup creamy peanut butter
  • 1 tablespoon vanilla extract
  • 7 & 1/2 ounces peanut butter cups (about 25 miniature cups), coarsely chopped
  • 4 ounces Butterfinger candy bars (about 7 small candy bars), coarsely chopped
  • 1 cup semisweet chocolate chips

Preheat oven to 350°. Line a 13″x 9″pan with aluminum foil, allowing it to extend over edges of pan. Grease/spray foil.

Combine crushed cookies and butter. Press mixture into bottom of prepared pan. Bake for 6-8 minutes.

Combine condensed milk, peanut butter, and vanilla, stirring until smooth. Set aside.

Sprinkle chopped candy bars and chocolate morsels over crust. Drizzle condensed milk mixture over toppings.

Bake for 30 minutes or until lightly browned. Cool in pan on wire rack. Using foil, lift out of pan. Peel foil away, and cut into bars.

Makes 28 small or 18 large bars.

Click here for printable recipe


Friday, October 9, 2009

Cookie Truffles


Three ingredients.

One hour.

36 mindblowing truffles.

MINDBLOWING.

And you know I never exaggerate.

But let me back up for a minute. This all started as I was roaming around the Bakerella website. There is an area on this fabulous site called "Bite-size," which always fascinates me. There are a ton of things that I am way too intimidated or impatient to try, like little cake lollipops on sticks, but there are also lots of little baby sweet treats that draw me in like a moth to a flame. And when I saw the words "Nutterbutter" and "truffle" in the same sentence...well, they had me at hello. Or to be perfectly accurate, they had me at Nutterbutter.

So here's what you need: one package of Nutterbutter cookies. One package of cream cheese. One package of chocolate candy melts (I got the kind made by Wilton. If you have a Michael's craft store anywhere nearby, they sell them in all sorts of flavors.) You grind up almost the entire package of cookies in your friendly food processor until they are completely pulverized. Then dump the cookie crumbs into a bowl and mix them up with the softened cream cheese. Honestly, the best way to do this is with your hands. It will seem like a REALLY bad idea for the first 30 seconds or so but trust me, it will all come together. Once the cookies and cream cheese have come together in a smooth truffle dough, start rolling pieces of dough into little one inch balls of heaven. You will be powerless against taking little bites of the truffle dough as you go along, and you will see that it tastes kind of like Nutterbutter cheesecake.

Once you are done making the little balls, it's time for the coating. I dumped the candy melts into a bowl and nuked them for about 2 minutes on 50% power in my microwave, stirring them at 30 second intervals until they were perfectly melted and creamy and smooth. Then all you need to do is roll the little truffle balls in the melted chocolate (I found this easiest by putting them on a teaspoon and swirling them around). Place them on a cookie sheet covered in wax paper, and when you are done, put them in the fridge so the chocolate can harden back up.

From there on in, you are in Nutterbutter truffle heaven. I thought life could not get any better. And then...


...I made Oreo truffles, with white chocolate coating. All I will say is, I left some on the counter the day my beloved housecleaning guy came this week, and he left me the following note:

"Sweet Mother of God, those oreo truffles are out of this world FANTASTIC!!!"

That pretty much sums things up.


COOKIE TRUFFLES, adapted from www.bakerella.com


  • 1 16 oz package Nutterbutters or Oreos
  • 1 8 ounce package cream cheese, softened
  • 1 14 ounce package candy melts

1. Place all but 6 cookies in food processor and process until ground to fine crumbs.

2. Put crumbs and cream cheese in bowl and mix until completely combined.

3. Form dough into one inch balls

4. Melt candy in microwave in 30 second increments, stirring in between each heating, until melted.

5. Coat each ball in candy and place on cookie sheet covered in wax paper.

6. Chill in refrigerator until candy is hardened.

7. Do what you will with those 6 extra cookies.


Align Center


Wednesday, September 23, 2009

Peanut Butter Fudge Treats


Yes, these ARE what you think they are. Rice Krispy Treats, topped with a layer of peanut butter fudge, topped with a layer of chocolate fudge. Oh, baby. It's practically too much to wrap your mind around, right??

This recipe comes via one of my favorite websites for sinfully sweet stuff, Joy The Baker (see my blogroll), and she credits them back to a combination of the classic Rice Krispy Treat plus a peanut butter fudge recipe from Alton Brown, plus a standard recipe for chocolate fudge. As you can see, it takes a village to make something so incredibly, decadently good. They are really, really easy to make -- the hardest part, quite honestly, is waiting in between stages for the various layers to cool.

When you make these (because let's be honest, you KNOW you are going to make these), here are a few pieces of advice. Cut them into SMALL pieces. I cut mine into one inch squares. Eating a piece bigger than one inch could make all your teeth fall out at once. Second, I store mine in the fridge. There is definitely enough sugar in these to keep them perfectly fine stored on the kitchen counter, but I liked the harder consistency of the cold fudge. That's just me, though. Fudge consistency is a very personal decision, and I leave that up to you.

I think that is all I have to say about these, except that you have to make them as soon as humanly possible. You only go around once.


PEANUT BUTTER FUDGE TREATS, adapted from joythebaker.com


Rice Krispy Treats


3 tablespoons butter or margarine
4 cups miniature marshmallows
6 cups Rice Krispy Cereal (or any puffed rice cereal)

1. In large saucepan melt butter over low heat. Add marshmallows and stir until completely melted. Remove from heat.

2. Add Rice Krispies cereal. Stir until well coated.

3. Using buttered spatula or wax paper evenly press mixture into 13 x 9 x 2-inch pan coated with cooking spray.

4. Cool. Make Peanut Butter Fudge.


Peanut Butter Fudge (recipe from Alton Brown)

1 cup butter
1 cup smooth peanut butter
1 teaspoon vanilla
1 pound confectioners (powdered) sugar

1. Microwave butter and peanut butter for 2 minutes on high.

2. Stir and microwave on high for 2 more minutes. Add vanilla and powdered sugar to peanut butter mixture and stir to combine with a wooden spoon.

3. Pour over the Rice Krispy treats in the pan and spread evenly.

4. Let cool in the fridge while you make the Chocolate Fudge.

Easy Chocolate Fudge

2 Tbsp butter
2/3 cup evaporated milk
1 2/3 cups sugar
1/2 tsp salt
2 cups miniature marshmallows
1 1/2 cups semisweet chocolate chips
1 tsp vanilla

1. Combine butter, milk, sugar, and salt in a saucepan over medium heat. Bring to a boil; cook 4 to 5 minutes, stirring constantly. Remove from heat.

2. Stir in marshmallows, chocolate, and vanilla,. Beat for about 1 minute, or until marshmallows melt and mixture is thoroughly combined.

3. Pour over peanut butter fudge, spread evenly and place in the fridge to harden and cool.

4. Cut into 1-inch pieces or smaller.


Click here for printable recipe